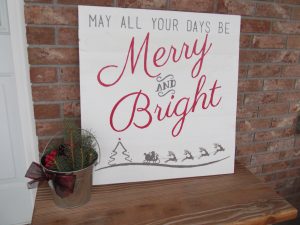
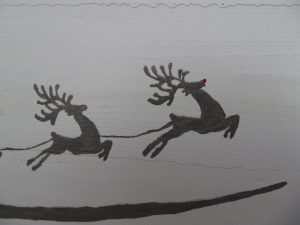
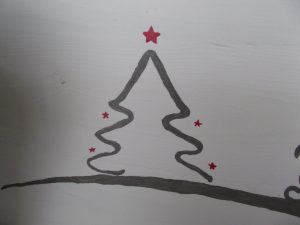
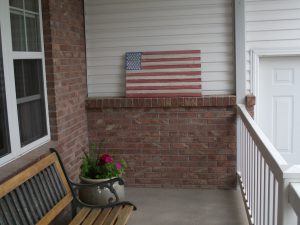
I don’t know if you have noticed but I’ve been really into making signs lately. It’s a new hobby of mine that I started doing in September and have found that I actually really enjoy it. We have a place called the “hatch pit”. The city provides a place to dump any tree clippings, wood, construction stuff, and sod. Well sometimes people dump pallets that are in pretty good shape. You can scavenge the wood area where the pallets are and so it’s free to take. Corey and I got quite a bit of wood from there to supply my new hobby. Corey has also enjoyed working on some wood projects of his own. I usually tell him I need a sign what size and he’ll put it together for me. He also made a wood box for a table center piece. It turned out pretty cool. Maybe I’ll post a picture of it some time. I saw this post on pintrest here. I decided I wanted one too and created an image that I wanted on my computer. Then I printed and transferred the image onto the sign and hand painted it. I’m so happy with the results. What do you think?
Tag Archives: project
Christmas Cards
Posted on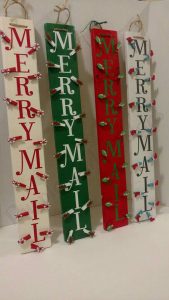 I know it’s early to be thinking about Christmas but this is the time I always start thinking about cards. I love getting Christmas cards and was thinking I would make a sign like the one on the left to hold the cards I receive this year. Although Each year the number of cards we receive reduces. I think only one of my siblings sends a card to us each year(hint hint to all you others). Is it really that hard to put something in the mail? I know the season gets super busy. Last year was the first and only year that we didn’t send any cards. It was silly really we just didn’t think ahead in time to get one together. I used to make handmade cards and my husband would write a family letter. That was really time consuming. Now we take a family photo upload them to our big box store and print out a bunch of cards. They even come with envelopes. It usually only cost around $11 dollars to print 30 cards. It really isn’t too hard. So no excuses this year. If you want a card from us this year send me a message with your address but know that if I send you one I expect one in return. It doesn’t have to be fancy it can be a note that just says Hi. The virtual cards or emailed cards don’t count. I can’t hang that on the wall and look at it everyday. Let’s see if I can fill my sign this year. I’ll post in December the finished product.
The Week Before School Goals 8 & 9
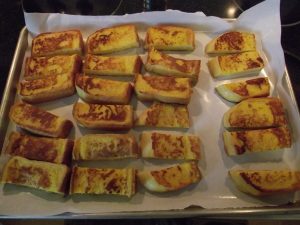
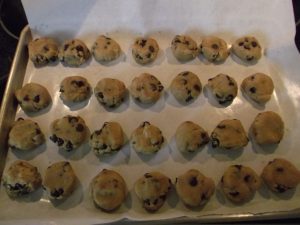
Posted onThe week before school Goal 8: As I’ve said before I’m not a morning person so making a big nutritious breakfast for my kids before school is not on my mind in the morning. Usually it’s cold cereal. I like to make some things to go into the freezer to give a kids a better option for breakfast. Yesterday I made some french toast sticks. I get the big texas toast and make french toast than cut them into strips. I’ll freeze them so then my kids in the morning can just grab a few and stick them in the microwave and wallah yummy breakfast. Today I’m making breakfast burritos. These freeze really well. It takes about a dozen scrambled eggs, hashbrowns, bacon, & cheese. I’ll scramble the eggs until they are just a little runny and then layer in a tortilla egg, hashbrown, bacon, and cheese. Roll them up and wrap them in saran wrap put them in a ziplock freezer bag and put them in the freezer. To heat them up we just unwrap them stick them on a plate and microwave for 2 mins turning half way through. I also made chocolate chip cookie dough this week and portion it out and froze that for the after school snacks.
The week before School Goal 9: Haircuts! I usually cut my kids hair at the beginning of summer and then let it grow all summer. By the time school starts they all really need a good haircut. I’ll probably take Sophia to a salon to get hers done because I’m not that familiar with cutting girls hair. The trick for this goal to be accomplished is convincing my boys that they need a haircut. My 14 year old is going to be especially tricky. Did I mention that I hate cutting hair and getting it all over and having to clean it up? Another reason this is going to be a difficult one to accomplish.
The week before school Goal 1 & 2
Posted onWe have had a great summer and it’s hard to see it gone but alas summer is almost over. My kids start school one week from today. The week before school starts I like to prep my kids so I know they are ready. My first goal for the week is waking my kids up at the time they would get up for school. That is 6:30 am for my elementary age kids and 7 am for my oldest. During the summer our sleep hours become lax. Bedtime gets pushed back and I let my kids sleep as long as they want in the morning. If I waited until the first day of school to start waking my kids up their bodies would not be used to the deprived sleep. They would be grumpy at school and want to sleep. I can’t do that to the teachers who work so hard to give my children their all.  That is why we prep them for school. That way the first day isn’t a shock to their system and they are ready to learn. This morning was tough. My alarm went off at 6:30 and automatically my hand flies up to push the snooze. I’m usually up at 6:30 for my morning walks but I’ve taken a little break and it’s already tough to wake up. Once I was up I went and woke the little ones. My 3rd grader had an easier time getting up. She is really a morning person. She will wake up all year round with a song and a smile. My 6th grader is a different story. He took a little longer and usually I pay for it later when tempers flair and he isn’t quite awake. It’s now 7:30 am and my two oldest are already arguing. My 9th grader who has been a morning child before has crept into that teenage cycle of wanting to sleep all the time. He gets to sleep in an extra half hour than the others because his school starts later. I woke him up at 7:05 this morning and didn’t see him until 7:20. Hopefully this gets better during the week.
The second goal for today is cleaning out my children’s dresser drawers. We will at some point need to go get new school clothes this week. So today we have to make room for those clothes. We will remove anything that isn’t being worn or is too small or worn out. We will fill a bag of slightly used clothing and take it to the DI (Deseret Industries). This is a must. I let my 6th grader hang on to too many shirts last year and now his drawers have a difficult time closing. He doesn’t even wear half of the shirts in there.
Old fence boards
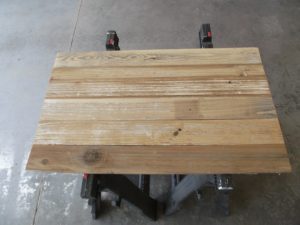
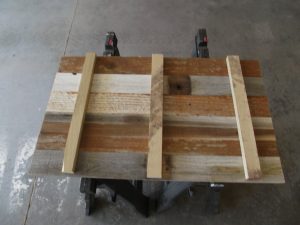
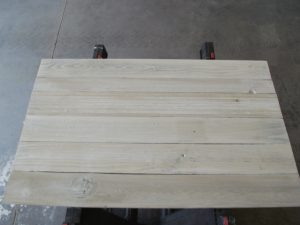
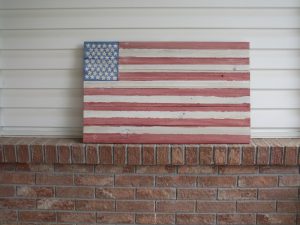
Posted on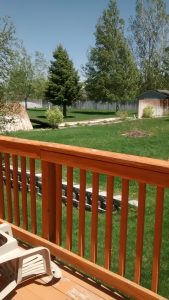 Back in May we had a major wind storm that blew a big portion of our fence down breaking some of the fence boards. Instead of throwing them out I wanted to use them somehow. I asked my husband to make me a flat plank out of them so I could make it into a flag.
This was perfect. I’ve seen the flags made out of pallets and I think they are cute but a little tacky with all the spaces and only a few stars on them. I’m not trying to offend anyone this is just my personal preference. I wanted something that looked closer to a real flag.
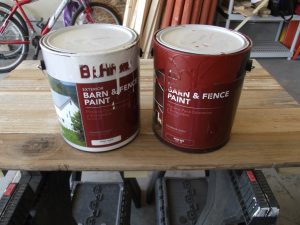
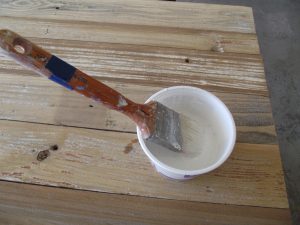
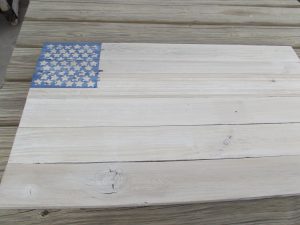
I started with white washing the whole board. I chose a white wash because I really liked the look of the grain of wood and wanted it to show through a little. We had some extra paint from the chicken coop my husband build a few months ago so that is the paint I used.
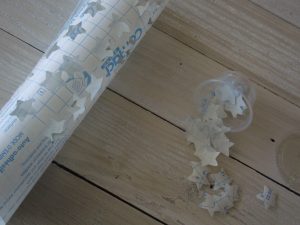
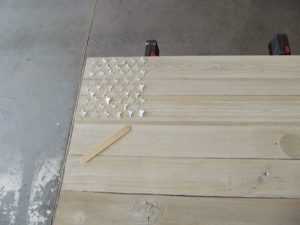
Then I cut out stars out of contact paper. I have a slice machine which made this easy. You could use a die cutter too. If you’re really dedicated you could cut them out by hand. I’ve also seen people stamp them on. I laid the stars out how I wanted them and then tediously peeled the backs off and stuck them to the board. I used a big craft stick to press them firmly on the board.
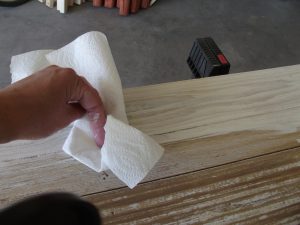
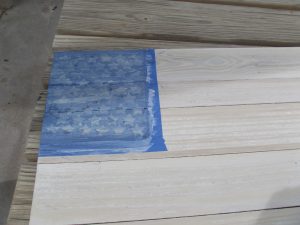
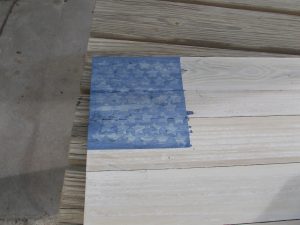
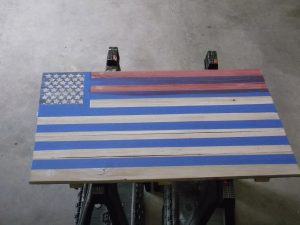
Next I went to home depot and got a sample can of dark blue paint for under $3. I did a wash on this paint too. 1 part paint to 2 parts water. I then applied it and wiped it off with a paper towel. I did this a couple of times until I got the look I wanted. I then waited for it to dry and took the stars off and the tape.
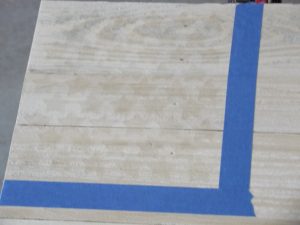
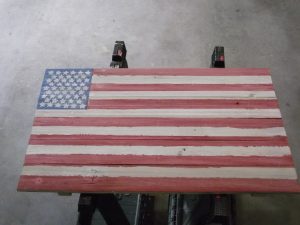
The blue paint bled a little into the white so I touched up a little with some white paint. My son thought I should leave a little of the blue paint on the stars because it gave it a rustic look so I did. Next I had to tape the border around the blue again to allow the red stripes to touch the blue. I measured and taped the 13 stripes. My planks height was 19 1/2 inches which made a nice 1 1/2 inch stripe for 13 stripes.
After it dried I took the tape off and Voila it was done. The red bled somewhat into the white. I left it because I wasn’t that picky about it. It kind of left it looking a little rough. Over all I like how it turned out. Now I have a little decoration for the 4th of July!
So much time!
Posted onNow that all my kids are in school I’ve had time to finish some projects that have been on my to do list. A couple of years ago I made Sophia a couple of skirts to wear to church. Recently I’ve noticed she has gotten much bigger and the skirts are now above her knees. I’ve been meaning to make her some new ones and now with some extra time I was able to make her not just one but 4! I went to the local fabric store and looked in their scraps and discount bins. I was able to find some pretty cute material. Then I looked up on Pintrest the link to the pattern. Here it is if you are interested in trying one yourself. http://www.scatteredthoughtsofacraftymom.com/2012/03/simple-skirt-tutorial-with-3-options.html
This is a very simple pattern and it only took me about an hour for each skirt. I love how quickly they came together. Now Sophia will have a skirt to wear for every week (unless there are 5 Sundays). She is supper excited about them. I think they are so cute I need to figure out how to make one for me.
The Case of the Missing Containers
Posted onI woke up this morning and started to empty the dishwasher. As I was doing so I noticed that I was missing a lot of plastic containers. Where might they have gone? I opened the fridge to get the milk for my cereal and this is what I saw. This fridge is so full of who knows what and how long it’s been in there is a mystery. So now I’m on the hunt for the missing containers my bet is that they are in this fridge somewhere. So guess what? Yep, it’s time to clean out the dreaded fridge.
I decided to look at cleaning the fridge in a who new way. I usually take out the rubber gloves, nose plug, and ten foot pole. This time, however, I decided to be grateful. I know, I know “be grateful?” how is that supposed to help??? As I was taking stuff out of the fridge I began to feel blessed. My family and I have been blessed to have an over flowing fridge. We have been blessed to have so much food that we can’t even keep up with it. There are so many people who struggle to make ends meet. They often end up wondering what they are going to feed their children if anything at all. My family may not have fancy things but I’ve never had to worry about what my kids will eat. By changing my attitude I was able to look at cleaning the fridge in a who new light. Of course that doesn’t get rid of the containers growing green fuzzies that make you gag as you open them. It sure does help you appreciate everything. So now I have a clean fridge and a grateful heart. It’s a really nice way to start your day. Oh, and I did eventually find my missing containers.
Pumpkin follow-up
Posted onI told you I would give an update on the pumpkins that we grew in the garden. That’s right I said pumpkins. Last time you saw one of these it was just a blossom. I hand pollinated 3 more for a total of 4. One pumpkin got the size of a baseball and then shriveled up and died. These pumpkins kept growing and growing and growing. I had to pluck them off the vine while they were still green. I then put them on my porch and let them turn orange. They all still have green on them but the kids didn’t mind. They are 27lbs, 24lbs, and 19lbs. These were the biggest pumpkins our family has ever carved. Definitely going to try growing pumpkins again next year. I just hope we get some blossoms about a month earlier than we did this year.
I let each kid design their own pumpkin. Preston decided he was going to name his count pumpkinstein. Corey had a little trouble with all the teeth Levi wanted on his. Sophia likes the circle (hers was nice and easy to carve). They turned out pretty cute and the kids had tons of fun scraping out the guts.
So being the forgetful person that I am I forgot to take pictures of the kids in their costumes 🙁 Preston’s was the most creative. He wanted to be an ice cream man and unfortunately I don’t have a picture of him. Sophia wanted to be a fairy. Levi wanted to be Dracula. There was one day last week that Levi had a School Program and we got pictures of him and Sophia dressed up. We went trunk or treating at our church and then Corey took Sophia and Levi around the block some more. Preston is getting so big, he wanted to go with his friends this year. One of the other parents went with them and they really scored on the candy. Pretty soon he is going to be too old to go trick or treating and I ‘m having a hard time coming to that realization. When did he start getting so old? I haven’t aged any so what happened here?
My Mom’s Apple Pie
Posted onI’d say this is the well kept family secret but can’t since we share this recipe with everyone. This is definitely a family favorite. I always loved it when I would walk home from school and the aroma of apple pie was in the air. This is by far my favorite pie. This recipe is also pretty simple and well worth it. I made a pie last week with the apples off of our little tree and it was so good. So good that I’ve made another pie this week. Anyways here is the recipe and step by step instructions on how to make it.
Filling:
6 Apples peeled and cut into slices
3/4 to 1 Cup sugar (depending on tartness of apples)
1 tsp cinnamon
dash of nutmeg
2 Tbs flour
1 Tbs lemon juice (depending on tartness)
Crust:
2 Cups flour
1 tsp salt
1/2 Cup cooking oil (canola or vegetable)
5 full tablespoons COLD water
First step is to peel, core, and chop the apples. I peel all the apples at once and then chop them. That way it keeps the browning from oxidization to a minimum. Each apple gets chopped into 8 pieces and then each of those slices gets chopped into quarter inch thick triangles.
Next step is to add the rest of the filling ingredients to the apples and mix. My apples were tart so I used 1 cup of sugar and no lemon juice. Put in a medium sauce pan and heat slowly on the stove (about medium low heat). Meanwhile start putting the crust together. Don’t forget about the filling give it a stir every few minutes or so believe me you don’t want the sugar to start to burn on the bottom of the pan.
This crust recipe is one of the most simple recipes I’ve ever come across. Many people are picky about their crust and I’m one of them. I love this crust because it is easy, flaky and taste good. Once you try this you’ll never go back to cutting in butter or shortening and letting it chill. You can also half this recipe for a one crust pie like pumpkin or pecan
In a large bowl combine the flour and salt. In small bowl combine the water and oil. It’s important to know what is meant by 5 full tablespoons of water. As you fill the tablespoon up with water continue to fill it until it is so full it makes a dome over the rim. If this doesn’t make sense let me know. Hey, by the way, Don’t forget to stir your filling.
After the dough had formed a ball split into two separate balls one slightly larger than the other. Slightly larger because the bottom crust is bigger than the top. Oh! And don’t forget to stir the filling.
Take the larger dough ball and place it between two pieces of wax paper. Roll out the dough with a rolling pin until it fits into your pie plate with extra over the sides. Don’t worry if the wax paper starts to wrinkle just lift it up and smooth it out.
Take one side of wax paper off and flip the crust into the pie pan. Push and position the crust until you have about 1 inch of crust hanging over the side of the pan. Slowly peal back the wax paper trying not to tear the crust. Don’t forget to stir the filling. Roll out the top crust between the wax paper and set it aside.
By now this is what your apple filling should look like. The sugar should look syrupy and the apples are starting to cook. When the filling is hot and bubbly that is when it’s time to add it to your crust. Preheat your oven to 400 degrees.
After adding the filling to your bottom crust dot the top with a tablespoon of butter. Before adding the top, this is very important, wet your finger with water and go around the rim of the crust. This will help the top crust adhere better and you won’t have a mess in your oven to clean up. Take one wax paper off the top of the top crust. Flip over and place over the top of pie. Press the rim together and peel off the remaining wax paper. Trim the crust until it is about an inch from the rim of the pie plate. Fold under the crust to lay on top of the rim. Using the two finger method crimp the edges.
Cut slits in the top crust to allow steam to escape during baking. I like to make a star or flower shape on the top. Sprinkle with sugar and bake at 400 degrees for 20-25 minutes or until crust is golden. Take out of oven and place it on a rack until completely cooled. Serves 6-8 slices.
Apples
Posted onApple season is finally here. We planted this honey crisp apple tree about 5 years ago. This is the first year that we have had a good crop of apples. We bought the tree bare root. It was practically a little stick with roots. After planting it in the fall we didn’t expect blossoms on the tree in the spring but there were. No apples developed that year. The next year there were no blossoms at all. The third time a few blossoms and a couple of wormy apples. The fourth year we were optimistic but because of a late frost that killed all the blossoms there were no apples. This year has been good to us. The tree blossomed and we had an abundance of fruit growth. My husband was continually out there thinning them. We have had to put braces up to keep the trees branches from falling and breaking with the weight. I’ve sprayed it twice to try and keep the worms down. Although we now see that I needed to either do it earlier or more often. There are a number of apples with little worm holes in them. Other than that there haven’t been to many things I’ve had to worry about. Well that’s not true there is one pest that is causing my apples to disappear. They’re about 15 years old and one of them lives next door. Yep that’s right it’s the pesky teenager. For a couple of weeks we have been getting after our kids for eating the apples and leaving the cores in the road. They denied ever doing it but we knew the apples weren’t eating themselves. Well today I was cleaning my kitchen and heard a ruckus outside. I turned around just in time to see three teenage boys eating apples and throwing the core into the street. That’s right MY APPLES. This pest wouldn’t be so bad had they come and got my permission but no they just take. Well I guess I can’t blame them the apples look delicious and if I don’t say so myself are delicious. It’s hard to pass by without wanting a taste. I do like to make applesauce and pie filling every year. Maybe this year I won’t have to beg my neighbors for apples. I’ve made two apple pies so far and they have been the best apple pies. Next time I’ll share with you a step by step apple pie recipe.

