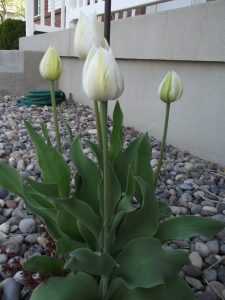
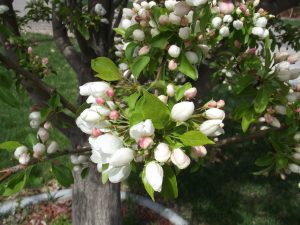
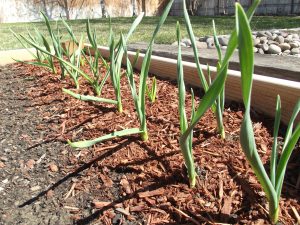
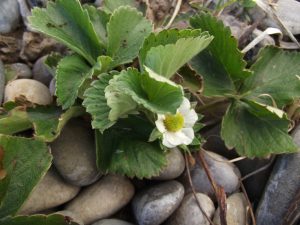
I love this time of year. Spring is one of my favorite seasons. I feel lucky because I get to experience it twice this year. The first was in Grants Pass when everything there was in full bloom and the second here at home. When my children were pre-school age I used to take them on walks around the block. I would always ask them to look for the signs of spring. They would tell me about the flowers and the leaves on the trees. They would hear the birds singing and see them flying around. They could feel the sun on their face and the warmth in the air. Even though my kids are a little older I still like to walk around and see the signs of spring. It’s been really fun this year because we are in a new area. I have so many little surprises popping up at my house that I didn’t know about. For example the tulips that popped up in the front. I didn’t plant them but I think I like them so much I’m going to add more for next year. Another surprise is the tree in our front side yard. It has these pretty blossoms coming on. I have no clue what kind of tree it is but I’m really enjoying the blossoms. One of my favorite signs of spring is the garlic in our garden. I plant the garlic in the fall and I know it’s planting time when the garlic pops up out of the ground and starts to grow. I can’t wait to get out there and start planting my spring veggies like onion, lettuce, peas, and even getting the beans in the ground. I’m grateful that I have the chance to see all these beautiful things and that I have time to enjoy them. I like to say it makes my soul smile. It just plain makes my world brighter. So take the time to enjoy the signs of spring and give your soul a chance to smile.
Category Archives: garden
Cabbage
Posted on This year Corey and I planted 4 cabbage plants. That means we now have 4 cabbages. A few years ago we made sauerkraut. I was a little nervous about it at the time but it turned out pretty good. So this year we have decided to do it again. As part of cleaning out my fridge (see previous post) I had finally decided to get started on the sauerkraut. The recipe I have calls for 20lbs of cabbage. That is a crap load of cabbage. With our 4 heads we only had 12lbs. I started shredding and after two I decided that was plenty of sauerkraut for us. We only need a few jars and it last us a long time. I used my food processor (thanks again Corey’s mom for that) to shred the cabbage. Then you salt the cabbage and let it wilt for awhile. After that put it in the brining bucket. I had to make some extra brine so my cabbage was covered in liquid. Then cover with cheese cloth and place something heavy on top to keep the cabbage submerged. Now all you have to do is wait 3 to 6 weeks. Yes that is weeks. Now you see why I was so nervous about making this before. Everyday you have to skim the foam off the top. So I guess you’ll see the finished product in 3 to 6 weeks.
Pumpkin follow-up
Posted onI told you I would give an update on the pumpkins that we grew in the garden. That’s right I said pumpkins. Last time you saw one of these it was just a blossom. I hand pollinated 3 more for a total of 4. One pumpkin got the size of a baseball and then shriveled up and died. These pumpkins kept growing and growing and growing. I had to pluck them off the vine while they were still green. I then put them on my porch and let them turn orange. They all still have green on them but the kids didn’t mind. They are 27lbs, 24lbs, and 19lbs. These were the biggest pumpkins our family has ever carved. Definitely going to try growing pumpkins again next year. I just hope we get some blossoms about a month earlier than we did this year.
I let each kid design their own pumpkin. Preston decided he was going to name his count pumpkinstein. Corey had a little trouble with all the teeth Levi wanted on his. Sophia likes the circle (hers was nice and easy to carve). They turned out pretty cute and the kids had tons of fun scraping out the guts.
So being the forgetful person that I am I forgot to take pictures of the kids in their costumes 🙁 Preston’s was the most creative. He wanted to be an ice cream man and unfortunately I don’t have a picture of him. Sophia wanted to be a fairy. Levi wanted to be Dracula. There was one day last week that Levi had a School Program and we got pictures of him and Sophia dressed up. We went trunk or treating at our church and then Corey took Sophia and Levi around the block some more. Preston is getting so big, he wanted to go with his friends this year. One of the other parents went with them and they really scored on the candy. Pretty soon he is going to be too old to go trick or treating and I ‘m having a hard time coming to that realization. When did he start getting so old? I haven’t aged any so what happened here?
My Mom’s Apple Pie
Posted onI’d say this is the well kept family secret but can’t since we share this recipe with everyone. This is definitely a family favorite. I always loved it when I would walk home from school and the aroma of apple pie was in the air. This is by far my favorite pie. This recipe is also pretty simple and well worth it. I made a pie last week with the apples off of our little tree and it was so good. So good that I’ve made another pie this week. Anyways here is the recipe and step by step instructions on how to make it.
Filling:
6 Apples peeled and cut into slices
3/4 to 1 Cup sugar (depending on tartness of apples)
1 tsp cinnamon
dash of nutmeg
2 Tbs flour
1 Tbs lemon juice (depending on tartness)
Crust:
2 Cups flour
1 tsp salt
1/2 Cup cooking oil (canola or vegetable)
5 full tablespoons COLD water
First step is to peel, core, and chop the apples. I peel all the apples at once and then chop them. That way it keeps the browning from oxidization to a minimum. Each apple gets chopped into 8 pieces and then each of those slices gets chopped into quarter inch thick triangles.
Next step is to add the rest of the filling ingredients to the apples and mix. My apples were tart so I used 1 cup of sugar and no lemon juice. Put in a medium sauce pan and heat slowly on the stove (about medium low heat). Meanwhile start putting the crust together. Don’t forget about the filling give it a stir every few minutes or so believe me you don’t want the sugar to start to burn on the bottom of the pan.
This crust recipe is one of the most simple recipes I’ve ever come across. Many people are picky about their crust and I’m one of them. I love this crust because it is easy, flaky and taste good. Once you try this you’ll never go back to cutting in butter or shortening and letting it chill. You can also half this recipe for a one crust pie like pumpkin or pecan
In a large bowl combine the flour and salt. In small bowl combine the water and oil. It’s important to know what is meant by 5 full tablespoons of water. As you fill the tablespoon up with water continue to fill it until it is so full it makes a dome over the rim. If this doesn’t make sense let me know. Hey, by the way, Don’t forget to stir your filling.
After the dough had formed a ball split into two separate balls one slightly larger than the other. Slightly larger because the bottom crust is bigger than the top. Oh! And don’t forget to stir the filling.
Take the larger dough ball and place it between two pieces of wax paper. Roll out the dough with a rolling pin until it fits into your pie plate with extra over the sides. Don’t worry if the wax paper starts to wrinkle just lift it up and smooth it out.
Take one side of wax paper off and flip the crust into the pie pan. Push and position the crust until you have about 1 inch of crust hanging over the side of the pan. Slowly peal back the wax paper trying not to tear the crust. Don’t forget to stir the filling. Roll out the top crust between the wax paper and set it aside.
By now this is what your apple filling should look like. The sugar should look syrupy and the apples are starting to cook. When the filling is hot and bubbly that is when it’s time to add it to your crust. Preheat your oven to 400 degrees.
After adding the filling to your bottom crust dot the top with a tablespoon of butter. Before adding the top, this is very important, wet your finger with water and go around the rim of the crust. This will help the top crust adhere better and you won’t have a mess in your oven to clean up. Take one wax paper off the top of the top crust. Flip over and place over the top of pie. Press the rim together and peel off the remaining wax paper. Trim the crust until it is about an inch from the rim of the pie plate. Fold under the crust to lay on top of the rim. Using the two finger method crimp the edges.
Cut slits in the top crust to allow steam to escape during baking. I like to make a star or flower shape on the top. Sprinkle with sugar and bake at 400 degrees for 20-25 minutes or until crust is golden. Take out of oven and place it on a rack until completely cooled. Serves 6-8 slices.
Apples
Posted onApple season is finally here. We planted this honey crisp apple tree about 5 years ago. This is the first year that we have had a good crop of apples. We bought the tree bare root. It was practically a little stick with roots. After planting it in the fall we didn’t expect blossoms on the tree in the spring but there were. No apples developed that year. The next year there were no blossoms at all. The third time a few blossoms and a couple of wormy apples. The fourth year we were optimistic but because of a late frost that killed all the blossoms there were no apples. This year has been good to us. The tree blossomed and we had an abundance of fruit growth. My husband was continually out there thinning them. We have had to put braces up to keep the trees branches from falling and breaking with the weight. I’ve sprayed it twice to try and keep the worms down. Although we now see that I needed to either do it earlier or more often. There are a number of apples with little worm holes in them. Other than that there haven’t been to many things I’ve had to worry about. Well that’s not true there is one pest that is causing my apples to disappear. They’re about 15 years old and one of them lives next door. Yep that’s right it’s the pesky teenager. For a couple of weeks we have been getting after our kids for eating the apples and leaving the cores in the road. They denied ever doing it but we knew the apples weren’t eating themselves. Well today I was cleaning my kitchen and heard a ruckus outside. I turned around just in time to see three teenage boys eating apples and throwing the core into the street. That’s right MY APPLES. This pest wouldn’t be so bad had they come and got my permission but no they just take. Well I guess I can’t blame them the apples look delicious and if I don’t say so myself are delicious. It’s hard to pass by without wanting a taste. I do like to make applesauce and pie filling every year. Maybe this year I won’t have to beg my neighbors for apples. I’ve made two apple pies so far and they have been the best apple pies. Next time I’ll share with you a step by step apple pie recipe.
Cantaloupe
Posted onIf you look at the first post about me starting to blog about the garden there’s a list about what I planted. You may notice that cantaloupe was not one of them. When we planted our watermelon we waited and waited and it did nothing so we decided to go get another plant and got a cantaloupe. I didn’t know that cantaloupe did so well here. I wish we had bought it instead of wasting time on the watermelon first. We so far have three cantaloupes and one is almost ready. They are about the size of a soft ball, smaller than your normal grocery store cantaloupe. I can’t wait to get my first taste of fresh garden cantaloupe I hear it’s really good. As for the watermelon we left it in the garden and as soon as the cantaloupe started to take off so did the watermelon. We now have a watermelon the size of a base ball. The sad thing is there is definitely not enough time for it to ripen before the first frost.
Grapes
Posted onWe planted Concord Grapes 3 years ago and this is the first year we have had grapes. Grapes usually have one season that they establish themselves and then produce the next. Why did it take us 3 seasons? We had an early frost last year that killed all the growth and the plant had to grow back from the roots. We now know that grapes are very sensitive and need a lot of tender care if you want any grapes. Last fall we mulched heavily around the vine and coved it in the spring if there was any chance of frost. We only have 6 clumps of grapes this year but we are happy to just have grapes. I don’t mind. I need a juicer first so I can make jelly and juice. This gives me at least another season to acquire the equipment before a big crop. We haven’t picked them yet because you’re supposed to wait until the first frost for the sugars to set like you do for apples. Plus they have just barely started to turn purple.
Pumpkin
Posted onPumkins, are the bane of my gardening skills. I have tried for many years now to grow pumpkins. I’ve tried many different varieties including the great giant, jack-o-lantern, and now Howden. I’ve searched the internet to see what I’ve possibly been doing wrong only to hear that pumpkins are really easy to grow. Urrrrgh! So not helping. All I wanted was at least one sizable pumpkin to carve for Halloween. Most years the pumpkin plant has barely grown. Last year I got a soft ball size pumpkin. This year all plant and no pumpkin. I know it’s not the area I live in. Friends in my neighborhood grow pumpkins just fine. One even had nearly 20 pumpkins growing in her garden last year. I’ve eagerly awaited thinking this year was going to be different. The plant took off and has been doing great. Lots of male blossoms but no female blossoms. We would see the female blossoms start to develop only to see it wither away before it even had a chance to blossom. Until this morning. Yes! I quickly went out there and hand pollinated the blossom to ensure pollination. It was in the 30s last night and not a lot of bees were buzzing around this morning. So I took a q-tip and rubbed some pollen from the male blossom and transfered it to the female blossom. I wonder if it’s too little too late. It’s already starting to get chilly. I hope this pumpkin takes and grows big enough for Halloween. Obviously something I’ll be updating on later. I do have a great recipe for pumpkin pie filling so maybe I’ll try a sweet pumpkin next year. Any suggestions on what variety to choose from?
Tomatoes
Posted onTomatoes are an essential part of my garden. I can whole tomatoes, tomato sauce, salsa, and spaghetti sauce. So I have to have tomatoes growing in my garden. We planted 8 tomato plants. Two of the plants are a cherry tomato. So far my favorite has been the early girl variety. It’s a smaller tomato but ripens pretty early which is necessary for this climate. Every year I’m on the search for a new favorite variety. I would like the tomato to be a little bigger. I planted 5 varieties. There are 4 early girls, 1 super fantastic, 1 Sophie’s choice (heirloom), 1 currant cherry tomato, and 1 sungold cherry tomato.
First I’ll discuss the cherry tomatoes. I plant at least one cherry every year because I like these in salads. This way I don’t have to use my bigger tomatoes for my salads. They also produce a lot sooner and you are able to have them during the summer. I usually plant a sweet 100 cherry tomato. I thought I would try something different this year. Wrong idea. I got the currant cherry tomato. These are super small and don’t have a lot of flavor. They are also difficult to pick. They grow like a currant in big clusters and really close to the center of the plant. The tomatoes on the bottom of the plant were the first to ripen. In order to get to them I had to crawl on my hands and knees and stick my hand all the way in the plant to pick. Even then you couldn’t tell if you were getting the right tomato because they were so closely clumped together. Many times I would end up picking a green tomato instead of the red one. So frustrating. I’ve gotten to the point that I don’t even care if they get picked or not.
The other cherry tomato that I picked is called Sungold. This is a small orange cherry
tomato. We love this one. It is so sweet. This is the variety that we got a few years ago when we first started gardening and it single handedly convinced my husband that tomatoes aren’t gross. Sophia, my three year old, loves this one and we have to act quickly if we want any before she picks them all. Definitely one we’ll do again.
The Super Fantastic variety was a mothers day gift from church. I actually like this one. It produces a lot of large tomatoes and taste terrific. The only problem I have with this one is that it splits easily. I think all the tomatoes that I’ve pulled off of there so far have split. That’s okay if you’re using it for salsa but not okay for whole tomatoes. This might be a variety I’ll try again since I do like salsa.
Sophie’s Choice variety I got on a whim. I was looking for just one more tomato to plant and one that produces early and is larger than the early girl. Saw this one and got it. It was a little more expensive because it’s an heirloom tomato but so far it has done great. The tomatoes are larger and don’t seem to have any splits but they are taking longer to ripen then my other tomatoes. I just hope they ripen before the first frost in a couple of weeks.
Tomatoes are pretty easy to plant. They are very frost tender so if you live in a cooler climate like I do you’ll need to have your tarp ready to cover them. Tomatoes are also very easy to can and great to have in the pantry. We use our whole tomatoes in soups, stews, casseroles, and even chili. The key is to find the right variety that works for you.
Huckleberry Muffins
Posted onHere is an update on those huckleberries. One of the things I decided to do was make huckleberry muffins. I’m surprised that I’ve never had these before. I like blueberry muffins but they aren’t my favorite. So it seemed logical to substitute huckleberries instead of blueberries. These turned out great and I now have a new favorite followed closely by lemon poppyseed. One thing I don’t like about blueberry muffins is that they are often too sweet for my taste. The huckleberries solved that problem. The huckleberry has just the right amount of tartness to off set the sweetness of the muffin. So if your looking to try something new just take your favorite blueberry muffin recipe and substitute huckleberries.


